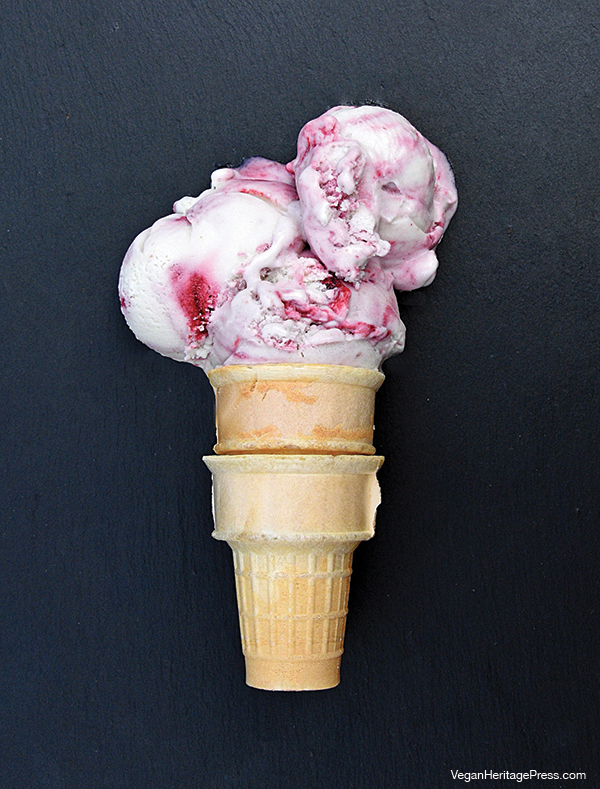
 This vegan Berry Swirl Coconut Ice Cream from Aquafaba by Zsu Dever is a refreshingly cool treat for a hot summer’s day.
Ice crystals form in ice cream each time it is thawed and refrozen, so it is recommend that you store your homemade Berry Swirl Coconut Ice Cream in smaller containers. This makes it easier to serve and prevents additional crystals from forming. Although this ice cream hardens in the freezer, it will soften after a few minutes out of the freezer because of the addition of glucose syrup. If you prefer to omit the glucose syrup, add six more tablespoons of sugar to the base.

Berry Swirl Coconut Ice Cream
Ice crystals form in ice cream each time it is thawed and refrozen, so it is recommend that you store your homemade ice cream in smaller containers. This makes it easier to serve and prevents additional crystals from forming. Although this ice cream hardens in the freezer, it will soften after a few minutes out of the freezer because of the addition of glucose syrup. If you prefer to omit the glucose syrup, add six more tablespoons of sugar to the base.
Ingredients
Cream Base
- 2 13.5-ounce cans full-fat coconut milk, refrigerated 1 hour and divided
- 1 tablespoon arrowroot or cornstarch
- 1/4 cup glucose syrup or light corn syrup
- 2 tablespoons granulated organic sugar
- 1 teaspoon psyllium husk powder
- 1/8 teaspoon sea salt
- 2 teaspoons pure vanilla extract
Meringue
- 1/2 cup aquafaba
- 1/4 teaspoon cream of tartar
- 1/4 cup granulated organic sugar
Berry Purée
- 1 (10-ounce bag; about 2 1/2 cups) frozen berries
- 2 tablespoons granulated organic sugar
Instructions
-
Cream Base: Scoop out the coconut cream from 1 can of coconut milk and add it to a medium saucepan. Discard 1/3 cup of the liquid from the can. Combine about 1/4 cup of the remaining liquid with the arrowroot or cornstarch to form a slurry and set aside. Add the rest of the can’s contents and the second can of coconut milk to the pan along with the glucose syrup, sugar, psyllium husk powder, and salt. Bring the mixture to a simmer over medium heat and cook until thickened, about 1 minute, stirring often with a whisk. Add the starch slurry and return to a simmer to thicken, stirring gently. Remove the cream base from the heat, stir in the vanilla, transfer to a large bowl, and cool to room temperature before adding the meringue.
-
Meringue: Add the aquafaba and cream of tartar to the bowl of a stand mixer. Using a whisk, whip the aquafaba for 10 seconds. Using a balloon whip attachment, whip the aquafaba on medium speed for 5 minutes. Increase the speed to medium-high and continue to whip for another 5 to 8 minutes, or until the aquafaba can hold stiff peaks (page 5) and is climbing the side of the bowl. Add the sugar, 1 tablespoon at a time, over the course of 3 minutes and continue to whip until the sugar has dissolved, about 3 more minutes.
-
Add a large scoop of the meringue to the cooled cream base and mix well. Add the rest of the meringue to the tempered cream base and fold to mix thoroughly. Chill in the refrigerator until completely cold, about 8 hours.
-
Berry Purée: Combine the berries and the sugar in a medium saucepan over medium heat. Cover and cook until the berries break down, 10 to 13 minutes, stirring once. (If using strawberries, blend the berries to break them down.) Transfer the berries to a fine-mesh strainer set over a bowl. Sieve the berries through to remove all the seeds; you should have 1 cup of purée. Return the purée to the pan and cook over medium heat until reduced by half, 13 to 16 minutes, stirring more toward the end of the cooking. Chill completely before using.
-
Freeze the ice cream in an ice cream machine as directed by the manufacturer. Using a large spoon, stir in 3 to 4 tablespoons of berry purée, leaving streaks of the purée in the ice cream. Enjoy it as soft serve immediately or transfer it to an airtight, freezer-safe container and freeze. Allow the ice cream to soften for 10 to 20 minutes before serving if completely frozen.
Recipe Notes
Although aquafaba is best if homemade using the recipe provided in the book, you can use aquafaba from canned chickpeas. Use the organic, low-sodium, canned chickpeas and strain off the liquid into a measuring cup using a fine mesh strainer. Note the amount of liquid you acquired, then add it to a medium saucepan and bring to a boil. Reduce to a simmer and cook until the liquid reduces by 1/3. Cool the aquafaba completely before using.
 Recipe from Aquafaba, copyright © 2016 by Zsu Dever. Used by permission.